Peppermint Bark Recipe
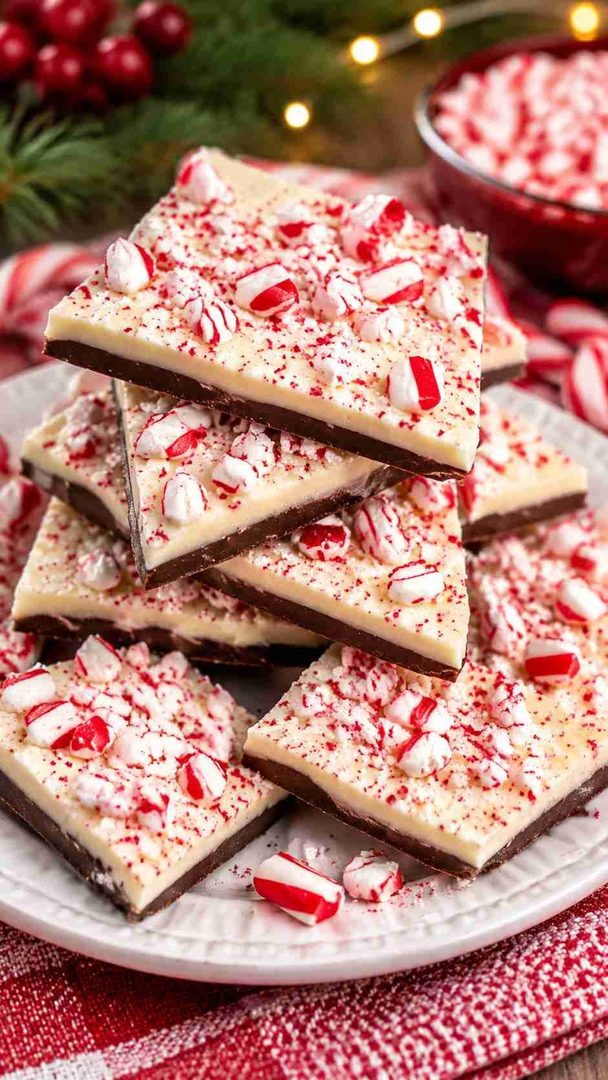
This peppermint bark recipe gives you a festive no-bake treat with five ingredients. Creamy white chocolate and rich semi-sweet chocolate stack into three pretty layers. A hint of peppermint keeps the flavor bright but never overpowering.
Crushed candy canes add color and a sweet, chewy crunch. You only melt, spread, and chill, with no oven needed. It sets in about an hour for cookie trays and gifts. Below, you’ll find easy steps, swaps, and storage tips.

Quick Recipe Snapshot
- Prep Time: 30 minutes
- Cook Time: About 5 minutes of melting, no baking required
- Total Time: About 1 hour 30 minutes, including setting time
- Servings: One 8- or 9-inch pan, about 16 to 20 pieces
- Difficulty: Easy
- Best For: Christmas cookie trays, holiday gifts, and baking with kids
Before You Start
A few quick steps make melting and layering smooth and stress-free.
- Initial preparation: Line your square pan with parchment paper or foil first.
- Ingredient organization: Chop each chocolate separately and divide the white chocolate in half.
- Equipment requirements: Grab a microwave-safe bowl, spatula, lined pan, and rolling pin.
- Temperature considerations: Melt chocolate slowly in short bursts so it never scorches.
- Important preparation reminders: Crush the candy canes before melting the final white layer.
Ingredient List
These five simple ingredients create a creamy, minty, and festive layered treat.
- 12 oz (339g) white chocolate: Use quality bars, coarsely chopped and divided in half.
- 6 oz (170g) semi-sweet or bittersweet chocolate: Coarsely chop it for even, quick melting.
- 1½ tsp vegetable or coconut oil: Divide into three ½-teaspoon portions, one per layer.
- ½ tsp peppermint extract: Divide into two ¼-teaspoon portions for the first two layers.
- 2–3 regular candy canes (24–36g): Unwrap and crush them into small, sparkly pieces.
Ingredient Substitutions
These simple swaps help you adjust the bark for different tastes and diets.
- Dairy-Free Chocolate: Use dairy-free white and dark chocolate bars in equal amounts.
- Peppermint Oil: Replace each ¼ tsp of extract with one drop of oil.
- Dark Chocolate Layer: Swap the semi-sweet chocolate for 6 oz of 70% dark chocolate.
- Two-Layer Version: Use 8 oz of each chocolate and skip the third layer.
- Peppermint Candies: Swap candy canes for crushed starlight mints on the top layer.
Equipment You Need
A few basic tools keep this bark neat, smooth, and easy to cut.
- 8- or 9-inch square pan: Shapes the bark into even, thick layers.
- Parchment paper or foil: Lines the pan so the set bark lifts out easily.
- Microwave-safe bowl or measuring cup: Melts each chocolate layer safely and pours cleanly.
- Silicone spatula: Stirs the chocolate smooth between each short melting burst.
- Offset spatula: Spreads each layer thin and smooth from edge to edge.
- Rolling pin: Crushes the candy canes quickly inside a sealed zip-top bag.
How to Make This Recipe?
This peppermint bark recipe comes together in five easy phases. You melt each chocolate with a little oil, then spread it into a lined pan. Short chills between layers help everything stick together. A final sprinkle of candy canes finishes the bark before it sets.
Phase 1: Prepare Everything
Line the bottom and sides of your pan with parchment paper or foil. Smooth out any wrinkles so the bottom layer stays flat. Chop the white and semi-sweet chocolates separately. Divide the white chocolate into two 6-ounce portions. Place the candy canes in a zip-top bag and crush them with a rolling pin.
Phase 2: Make the Bottom Layer
Add 6 ounces of white chocolate and ½ teaspoon oil to a heatproof bowl. Microwave in 20-second bursts, stirring well after each one. Once smooth, stir in ¼ teaspoon peppermint extract. Pour it into the pan and spread it into a thin, even layer. Chill for 10 to 15 minutes, until almost set.
Phase 3: Add the Middle Layer
Melt the semi-sweet chocolate with ½ teaspoon oil the same way. Stir in the remaining ¼ teaspoon peppermint extract. Pour it over the white layer and spread it smooth. Return the pan to the fridge for another 10 to 15 minutes.
Phase 4: Finish the Top Layer
Melt the remaining white chocolate with the last ½ teaspoon of oil. Skip the peppermint extract for this layer. Pour it over the chocolate layer and spread it evenly. Sprinkle the crushed candy canes across the top right away.
Phase 5: Set, Break, and Serve
Refrigerate the bark for about 1 hour, until fully firm. Lift it out of the pan and peel away the parchment. Break it by hand or cut it with a sharp knife. If it chilled over 3 to 4 hours, rest it for 10 minutes first.
How to Tell When It’s Ready?
Perfectly set bark shows a few clear signs. Check these before you break it apart.
- Appearance: The top looks glossy, firm, and evenly covered in candy cane pieces.
- Texture: The bark feels solid and no longer gives under light pressure.
- Temperature or Doneness: Each middle layer should feel almost set, not fully hard.
- Final Result: Clean, distinct layers that stay together when you break the bark.
Why Does This Recipe Work?
This bark keeps things simple while delivering classic holiday flavor. Here’s why it shines.
- Flavor combination: Sweet white chocolate balances the deeper semi-sweet chocolate in the middle. Peppermint adds a cool, fresh note without tasting like toothpaste.
- Texture and consistency: A little oil keeps the chocolate soft and melt-in-your-mouth smooth. Candy canes add a pleasant crunch that turns slightly chewy over time.
- Cooking method: Microwave melting in short bursts protects the chocolate from overheating. Brief chills between layers help each one bond to the next.
- Preparation time: Hands-on work takes only about 30 minutes from start to finish. The bark sets in an hour, so it suits busy holiday schedules.
- Ingredient accessibility: You can find every ingredient in most grocery store baking aisles. Candy canes are easy to grab during the holiday season.
Important Tips for Better Results
Small details make a big difference with chocolate bark. Keep these tips in mind.
- Use real chocolate bars: Chips contain stabilizers that keep them from melting smoothly.
- Chop evenly: Similar-sized pieces melt at the same rate without scorching.
- Melt in short bursts: Twenty-second increments stop white chocolate from seizing or burning.
- Don’t over-chill layers: Fully hardened layers can separate when you break the bark.
- Spread quickly: Tilt the pan gently to help the chocolate reach the corners.
- Add candy right away: Sprinkle candy canes while the top layer is still wet.
- Warm before cutting: Rest cold bark briefly so the layers stay together.
Recipe Variations and Customizations
This bark adapts easily to different tastes and occasions. Try these fun ideas.
- Make It More Flavorful: Add a pinch of flaky sea salt over the candy canes.
- Adjust the Texture: Temper the chocolate and set it at room temperature for snap.
- Create a Different Version: Swirl the white and dark chocolate together for marbled bark.
- Adapt It to Your Preferences: Sandwich white chocolate between two semi-sweet layers instead.
What to Serve With This Recipe?
Peppermint bark pairs well with warm drinks and festive treats. Pick what suits your table.
For Everyday Meals
Enjoy a piece with hot coffee or a mug of tea.
For Special Occasions
Add it to a Christmas cookie tray with sugar cookies.
For a More Complete Meal
Serve it as dessert after a holiday roast dinner.
For a Lighter Option
Pair a small piece with fresh berries or clementines.

Make-Ahead Preparation
This peppermint bark recipe is perfect for planning ahead. Here’s how to spread out the work.
- Prepare in Advance: Make the bark up to 3 weeks ahead and refrigerate it.
- A Few Hours Before Serving: Break or cut the bark into pieces for easy serving.
- Just Before Serving: Let cold bark sit 10 to 15 minutes to soften slightly.
Storage and Reheating
Bark keeps well with the right storage. Follow these simple steps.
- Refrigerator Storage: Store covered in an airtight container for up to 3 weeks.
- Freezer Storage: Freeze in a sealed container with parchment between layers for 2–3 months.
- Reheating Instructions: No reheating needed; just bring the bark to cool room temperature.
- Restoring the Original Texture: Chill soft bark for 15 minutes to firm it up again.
Common Problems and How to Fix Them
Even a simple peppermint bark recipe can go off track. Here’s how to fix common issues.
- The Texture Is Not Right: Grainy chocolate means it overheated, so melt in shorter bursts.
- The Flavor Is Too Mild: Add an extra ⅛ tsp peppermint extract to the middle layer.
- The Recipe Is Overcooked: Scorched chocolate can’t be saved, so start fresh with gentle heat.
- The Consistency Is Too Thick or Too Thin: Add a few drops of oil to thick chocolate.
- The Final Result Looks Different Than Expected: Separated layers mean over-chilling, so shorten the fridge time.
Frequently Asked Questions
Can I use chocolate chips in this peppermint bark recipe?
You can, but bars melt smoother. Chips contain stabilizers that resist melting.
Why are my peppermint bark layers separating?
The layers chilled too long. Only refrigerate each layer for 10 to 15 minutes.
Can I use mint extract instead of peppermint extract?
Peppermint works best. Regular mint extract can taste a bit like toothpaste.
How long does peppermint bark last?
It lasts up to 3 weeks in the fridge, or 2–3 months frozen.
Can I double the recipe?
Yes. Double every ingredient and spread the layers on a lined baking sheet.