Christmas Fudge Recipe
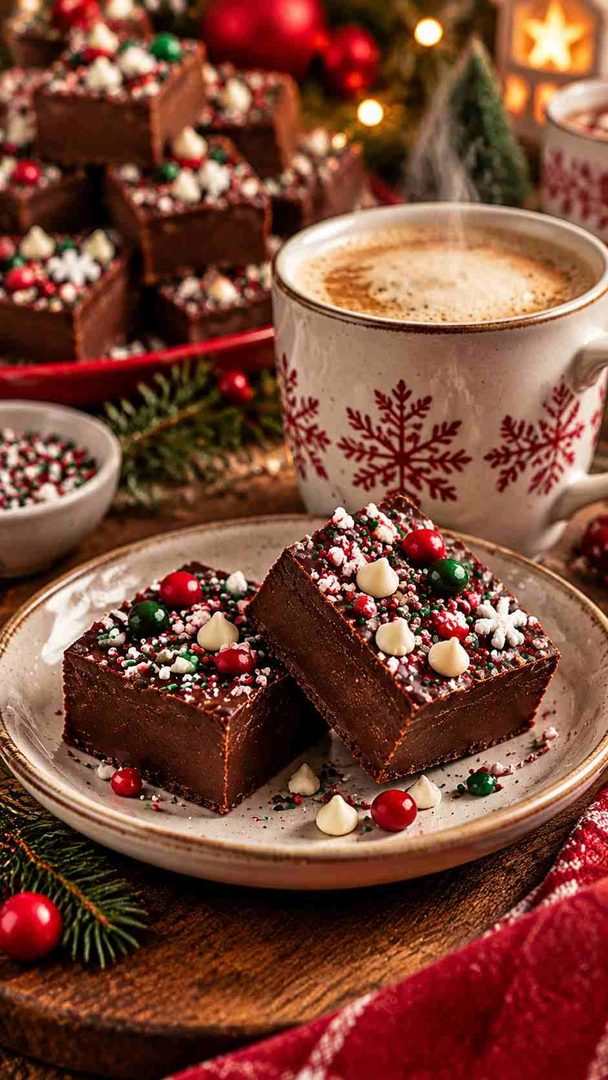
This Christmas fudge recipe turns six simple ingredients into rich, glossy squares. Sweetened condensed milk does the hard work here: no candy thermometer, no soft-ball stage, no guesswork. You melt dark chocolate, butter, and milk in one pot, pour, add sprinkles, and chill.
The result is deep chocolate flavor with a smooth, melt-in-your-mouth bite. Expect a festive no-bake treat that fits cookie tins, party platters, and last-minute holiday gifts.

Quick Recipe Snapshot
- Prep Time: 5 minutes
- Cook Time: 5 minutes
- Total Time: 2 hours 15 minutes (includes chilling)
- Servings: 25 pieces (about 1½-inch squares)
- Difficulty: Easy
- Best For: Holiday gifting, cookie trays, parties, and last-minute desserts
Before You Start
Good fudge starts before the stove turns on. A few minutes of setup keeps the process smooth.
- Initial preparation: Butter an 8×8-inch pan and line it with parchment paper. Leave a 2-inch overhang on two opposite sides for lifting.
- Ingredient organization: Measure the chocolate, open the can, and cube the butter. Keep everything within reach of the stovetop.
- Equipment requirements: You need one medium saucepan, a rubber spatula, and a pan. No candy thermometer is required for this recipe.
- Temperature considerations: Use medium heat only. Lower it slightly if the mixture starts sticking or bubbling.
- Important preparation reminders: Use sweetened condensed milk, not evaporated milk or cream. Stay at the stove and stir the entire time.
Ingredient List
- 3 Tbsp unsalted butter, cubed, plus extra for greasing the pan
- 2½ cups dark chocolate chips (about 14 oz; 60% to 70% cacao)
- 1 can (14 oz) sweetened condensed milk
- 1 tsp pure vanilla extract
- ½ tsp kosher salt
- 2 Tbsp Christmas sprinkles, or more for decorating
Ingredient Substitutions
Each swap below keeps the fudge’s structure intact. Make one change at a time for reliable results.
- Semisweet chocolate: Replace dark chips with 2½ cups semisweet chips. Expect a sweeter, milder fudge with the same texture.
- White chocolate swirl: Replace ⅓ of the dark chips with white chocolate chips. Melt everything together for a lighter, creamier flavor.
- Peppermint twist: Add ½ tsp peppermint extract with the vanilla. Top with 3 Tbsp crushed candy canes instead of sprinkles.
- Orange chocolate: Stir in 1 Tbsp fresh orange zest after removing from heat. Orange brightens dark chocolate without adding extra sweetness.
- Dairy-free version: Use sweetened condensed coconut milk, vegan butter, and dairy-free chips. The fudge sets slightly softer, so chill it longer.
Equipment You Need
- 8×8-inch baking pan: Shapes the fudge into an even layer. This size gives the right thickness for clean squares.
- Parchment paper: Lines the pan and creates handles. You lift the whole slab out in one piece.
- Medium heavy-bottomed saucepan: Spreads heat evenly across the base. This prevents scorching while the chocolate melts.
- Rubber spatula: Scrapes the bottom and corners as you stir. It also smooths the top once poured.
- Sharp chef’s knife: Cuts firm fudge into neat squares. Wipe it clean between cuts for sharp edges.
- Cutting board: Gives you a stable surface for trimming and slicing the slab.
How to Make This Recipe?
Christmas fudge is a one-pot, no-bake process. You prep the pan, melt the ingredients together, pour, decorate, and chill. Active time is about 10 minutes. The refrigerator handles the rest.
Phase 1: Prepare Everything
Butter the 8×8-inch pan lightly. Press parchment into the pan, leaving a 2-inch overhang on two opposite sides. The butter holds the paper in place. Cube the butter, measure the chips, and open the condensed milk. Set the vanilla, salt, and sprinkles next to the stove. Everything moves fast once the heat is on.
Phase 2: Start Building the Recipe
Add the butter, chocolate chips, condensed milk, vanilla, and salt to the saucepan. Set the heat to medium. Start stirring immediately with the rubber spatula. Scrape the bottom and sides often so nothing sticks or burns.
Phase 3: Develop the Main Components
Keep stirring for about 5 minutes as the chocolate melts. The mixture turns from lumpy to thick, glossy, and smooth. Lower the heat slightly if you see sticking or bubbling. Condensed milk is already emulsified (blended into a stable mixture), so the fudge holds together without eggs or extra sugar.
Phase 4: Bring Everything Together
Remove the pan from the heat once no lumps remain. Give it one or two final stirs. Pour the mixture into the prepared pan. Spread it into an even layer with the spatula. Press the bottom of a measuring cup across the top for a flatter surface.
Phase 5: Finish and Serve
Scatter the sprinkles over the top while the fudge is still warm. Press them lightly so they stick. Refrigerate for at least 2 hours and up to 1 day. Run a knife along the unlined edges, then lift the slab out using the parchment. Trim the edges and cut into 1½-inch squares.

How to Tell When It’s Ready?
Fudge gives clear signals at each stage. Check these before you slice.
- Appearance: The surface looks matte and firm, not wet or shiny.
- Texture: A gentle press leaves no dent. The slab holds its shape when lifted.
- Temperature or Doneness: The center feels fully cold after at least 2 hours.
- Final Result: Squares cut cleanly and taste smooth, rich, and creamy.
Why Does This Recipe Work?
This recipe removes the most common fudge failures. Here is why it delivers every time.
- Flavor combination: Dark chocolate brings depth, and condensed milk adds balanced sweetness. Salt and vanilla sharpen the chocolate without tasting salty.
- Texture and consistency: Condensed milk gives the fudge structure and creaminess. Butter adds richness and a softer, melt-in-your-mouth bite.
- Cooking method: Gentle stovetop melting replaces sugar boiling and candy thermometers. You skip the crystallization risk that makes old-fashioned fudge grainy.
- Preparation time: Active work takes about 10 minutes. The fridge does the setting while you handle other holiday tasks.
- Ingredient accessibility: Every ingredient is sold at standard grocery stores. Most home bakers already keep half of them in the pantry.
Important Tips for Better Results
Small details separate good fudge from great fudge. Use these tips to avoid common mistakes.
- Use quality chocolate: Choose 60% to 70% cacao chips like Ghirardelli. Better chocolate melts smoother and tastes richer.
- Prep the pan first: Line the pan before heating anything. Fudge starts firming quickly once it leaves the stove.
- Stir constantly: Keep the spatula moving the entire time. Chocolate scorches fast on the bottom of the pan.
- Add toppings warm: Sprinkle decorations immediately after pouring. They won’t stick once the surface sets.
- Taste before pouring: Add a pinch more salt if the fudge tastes flat.
- Slice cold: Cut fudge straight from the fridge for clean, sharp edges. Wipe the knife between cuts.
- Serve slightly chilled: Let squares rest 5 minutes at room temperature before serving.
Recipe Variations and Customizations
The base recipe adapts easily to new flavors and occasions. Try one of these ideas next.
- Make It More Flavorful: Add ½ tsp espresso powder with the chocolate. Coffee deepens chocolate flavor without tasting like coffee.
- Adjust the Texture: Stir in ½ cup toasted chopped pecans or walnuts after melting. Nuts add crunch against the creamy base.
- Create a Different Version: Swap sprinkles for holiday M&Ms or crushed candy canes. Gel food coloring swirls create a festive marbled look.
- Adapt It to Your Preferences: Pour into silicone molds for gift-ready shapes. Use flaky sea salt on top for a sweet-salty finish.
What to Serve With This Recipe?
Christmas fudge pairs well with drinks and other treats. Match it to the occasion.
For Everyday Meals
Serve one or two squares with hot coffee or cold milk after dinner.
For Special Occasions
Add fudge to a holiday dessert board with cookies and peppermint bark.
For a More Complete Meal
Offer fudge alongside hot chocolate and gingerbread cookies at holiday gatherings.
For a Lighter Option
Pair small squares with fresh strawberries, clementines, or tart raspberries.
Make-Ahead Preparation
Fudge is one of the best make-ahead holiday treats. Plan your timing around these stages.
- Prepare in Advance: Make the fudge up to 2 weeks ahead. Store it uncut and wrapped in the fridge.
- A Few Hours Before Serving: Lift the slab out and trim the edges. Cut into squares while still cold.
- Just Before Serving: Rest squares 5 minutes at room temperature. Arrange them on a platter or in gift boxes.
Storage and Reheating
Proper storage keeps fudge fresh and creamy for weeks. Follow these steps to protect quality.
- Refrigerator Storage: Keep fudge airtight in the fridge for up to 3 weeks. Layer parchment between pieces to prevent sticking.
- Freezer Storage: Wrap the slab tightly in plastic, then foil. Freeze in an airtight container for up to 3 months.
- Reheating Instructions: Fudge is not reheated. Thaw frozen fudge overnight in the fridge before serving.
- Restoring the Original Texture: Chill soft fudge for 30 minutes to firm it. Let hard fudge rest 10 minutes at room temperature.
Common Problems and How to Fix Them
Most fudge problems trace back to heat or ingredients. Use these fixes to get back on track.
- The Texture Is Not Right: Grainy fudge usually means overheating. Keep the heat at medium and stir constantly.
- The Flavor Is Too Mild: Use 70% cacao chocolate next time. Add a pinch of flaky salt on top.
- The Recipe Is Overcooked: Scorched chocolate tastes bitter and cannot be saved. Use a heavy pan and lower heat next batch.
- The Consistency Is Too Thick or Too Thin: Soft fudge needs more chill time. Thick, stiff fudge often means too much chocolate.
- The Final Result Looks Different Than Expected: Dull or oily fudge means separated chocolate. Stir longer off the heat to bring it together.
Frequently Asked Questions
Do I need a candy thermometer for this Christmas fudge recipe?
No. Sweetened condensed milk replaces the sugar-boiling step entirely. You only need to melt the ingredients until smooth.
Can I use evaporated milk instead of sweetened condensed milk?
No. Evaporated milk lacks the sugar and thickness the fudge needs. Your fudge will not set properly without condensed milk.
How long does Christmas fudge take to set?
Christmas fudge sets in about 2 hours in the refrigerator. Leave it up to 1 day for the firmest texture.
Can I use milk chocolate chips?
Yes, but the fudge will be sweeter and slightly softer. Add a few extra minutes of chill time.
How far ahead can I make fudge for holiday gifts?
You can make it up to 2 weeks ahead. Store it in the fridge, then pack it in tins with parchment layers.