Black Forest Thumbprint Cookies Recipe
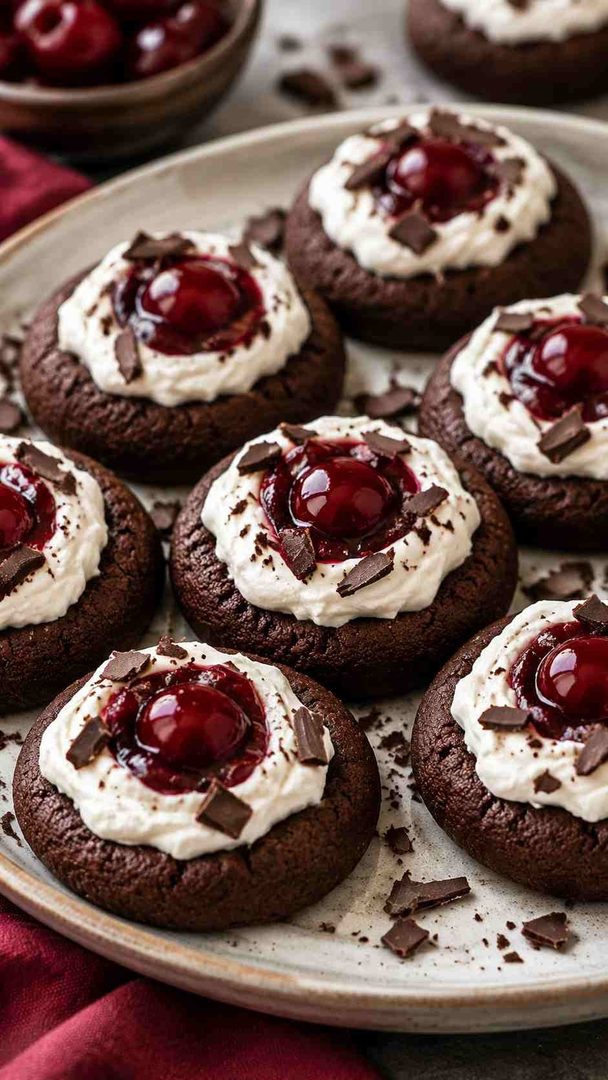
Black Forest Thumbprint Cookies pack the flavors of classic Black Forest cake into one bite. Each soft, cake-like chocolate cookie holds a glossy cherry in its center. A ring of whipped cream and a sprinkle of chocolate shavings finish the look. The dough comes together in minutes with pantry staples.
Store-bought toppings keep decorating fast and stress-free. Expect a festive, two-dozen batch that suits holiday trays, cookie swaps, and last-minute Christmas baking. You need about 35 minutes from start to finish.

Quick Recipe Snapshot
- Prep Time: 15 minutes
- Cook Time: 10 minutes
- Total Time: 35 minutes, including cooling time
- Servings: 24 cookies
- Difficulty: Easy
- Best For: Christmas cookie trays, holiday parties, and cookie exchanges
Before You Start
- Initial preparation: Set butter and egg on the counter for 30–60 minutes.
- Ingredient organization: Measure dry ingredients into one bowl before you start mixing.
- Equipment requirements: Line two large baking sheets with parchment paper first.
- Temperature considerations: Preheat your oven to 350°F while you mix the dough.
- Important preparation reminders: Decorate only cooled cookies, or the whipped cream melts.
Ingredient List
For the Cookie Dough
- 1½ cups all-purpose flour
- ½ cup unsweetened cocoa powder
- ¼ teaspoon baking powder
- ¼ teaspoon baking soda
- ¼ teaspoon salt
- 1 cup granulated sugar
- ½ cup (8 tablespoons) unsalted butter, softened to room temperature
- 1 large egg, at room temperature
- 1½ teaspoons vanilla extract
For the Topping
- About 1 cup cherry pie filling (1 cherry per cookie)
- Whipped cream topping (aerosol/spray kind)
- Chocolate shavings from semi-sweet or dark chocolate
Ingredient Substitutions
- Gluten-free flour: Swap in 1½ cups of a 1:1 gluten-free baking blend.
- Dairy-free option: Use plant-based butter sticks and coconut whipped topping.
- Fresh or frozen cherries: Simmer 1½ cups pitted cherries, ¼ cup sugar, and 1 tablespoon cornstarch until thick. Cool completely before filling.
- Almond twist: Add ¼ teaspoon almond extract with the vanilla and egg.
- Grown-up version: Stir 1 tablespoon kirsch (cherry brandy) into the pie filling before spooning.
Equipment You Need
- Stand mixer with paddle attachment: Creams butter and sugar until light and fluffy.
- Medium mixing bowl: Holds the flour, cocoa, leaveners, and salt mixture.
- Two large baking sheets: Let you bake all 24 cookies with proper spacing.
- Parchment paper: Stops sticking and helps cookies bake evenly on the bottom.
- Wire cooling rack: Cools cookies fully so the toppings stay firm.
- Vegetable peeler: Shaves thin, curly chocolate ribbons from a small chocolate square.
How to Make This Recipe?
Black Forest Thumbprint Cookies follow a simple five-phase process. You mix a chocolate dough, shape it into balls, and press a well into each one. The cookies bake for about 10 minutes, cool completely, and then get their toppings. The cherry, cream, and chocolate go on at the very end, right before serving.
Phase 1: Prepare Everything
Preheat your oven to 350°F. Line two large baking sheets with parchment paper and set them aside. In a medium bowl, stir together the flour, cocoa powder, baking powder, baking soda, and salt. Set this dry mixture aside while you work on the butter.
Phase 2: Start Building the Recipe
Add the sugar and softened butter to your stand mixer bowl. Cream them on medium-high speed until pale and fluffy. Scrape down the sides and bottom of the bowl. Add the egg and vanilla extract, then beat until fully combined.
Phase 3: Develop the Main Components
Turn the mixer to low speed. Add the dry ingredients slowly and beat just until combined. Stop to scrape the bowl as needed. Scoop rounded tablespoons of dough and roll them into balls. Place them 1½ inches apart on the lined sheets. Press your thumb or a spoon’s back into each center, going no more than halfway down.
Phase 4: Bring Everything Together
Bake the cookies for 10–11 minutes. They will puff up and look set around the edges. While still warm, press the centers down again to restore the wells. Use a spoon’s back or a thumb dipped in cool water. Cool the cookies on the sheets for 5 minutes, then move them to a wire rack.
Phase 5: Finish and Serve
Let the cookies cool completely before decorating. Spoon one cherry plus a little filling into each center. Pipe a circle of whipped cream around each cherry. Top with a few chocolate shavings and serve right away.
How to Tell When It’s Ready?
Thumbprint cookies give clear signs when they are done. Check these cues before you pull the sheets from the oven.
- Appearance: Edges look set and dry; centers look puffed and slightly soft.
- Texture: Tops spring back lightly when touched, without feeling wet or sticky.
- Temperature or Doneness: Pull them at 10–11 minutes, since chocolate dough hides browning.
- Final Result: A soft, cake-like cookie with a deep well holding the cherry.
Why Does This Recipe Work?
This recipe works because every element mirrors a classic Black Forest cake. Here is what makes it reliable and worth baking.
- Flavor combination: Chocolate, cherry, and cream form a proven dessert trio. The tart cherry filling cuts through the rich cocoa. Whipped cream softens everything into one balanced bite.
- Texture and consistency: The dough bakes into a soft, cake-like cookie. Its sturdy edges hold the filling without crumbling. The light cream adds contrast to the chewy center.
- Cooking method: Pressing the wells twice keeps the indentation deep and defined. The second press, done while warm, fixes any puffing from baking. That gives you a clean pocket for the cherry.
- Preparation time: The full batch takes about 35 minutes, cooling included. No dough chilling is required. You can bake these on a busy weeknight.
- Ingredient accessibility: Every ingredient sits in a standard grocery store. Store-bought pie filling and spray cream skip extra prep. You likely own most of the dough ingredients already.
Important Tips for Better Results
Small details make a big difference with thumbprint cookies. Use these tips to avoid the most common mistakes.
- Use true room-temperature butter: Soft butter creams properly; melted butter makes cookies spread.
- Measure flour with the spoon-and-level method: Packed flour creates dry, crumbly dough.
- Stop mixing once flour disappears: Overmixing builds gluten and toughens the cookies.
- Re-press centers right away: Warm cookies reshape easily; cooled cookies crack instead.
- Choose cherries over sauce: Use mostly whole cherries so filling does not run.
- Decorate just before serving: Whipped cream deflates within a few hours, even refrigerated.
Recipe Variations and Customizations
This cookie base adapts easily to new flavors and occasions. Try these ideas to make the recipe your own.
- Make It More Flavorful: Add 1 teaspoon espresso powder to deepen the chocolate taste.
- Adjust the Texture: Roll dough balls in sugar for a crisp, sparkly outer shell.
- Create a Different Version: Swap cherry filling for raspberry jam or salted caramel.
- Adapt It to Your Preferences: Use chocolate ganache instead of whipped cream for sturdier cookies.
What to Serve With This Recipe?
These cookies pair well with drinks and desserts that balance their richness. Match the pairing to your occasion.
For Everyday Meals
Serve with a glass of cold milk or a hot cup of coffee.
For Special Occasions
Add them to a holiday cookie board with shortbread and gingerbread.
For a More Complete Meal
Offer them after a roast dinner with vanilla ice cream on the side.
For a Lighter Option
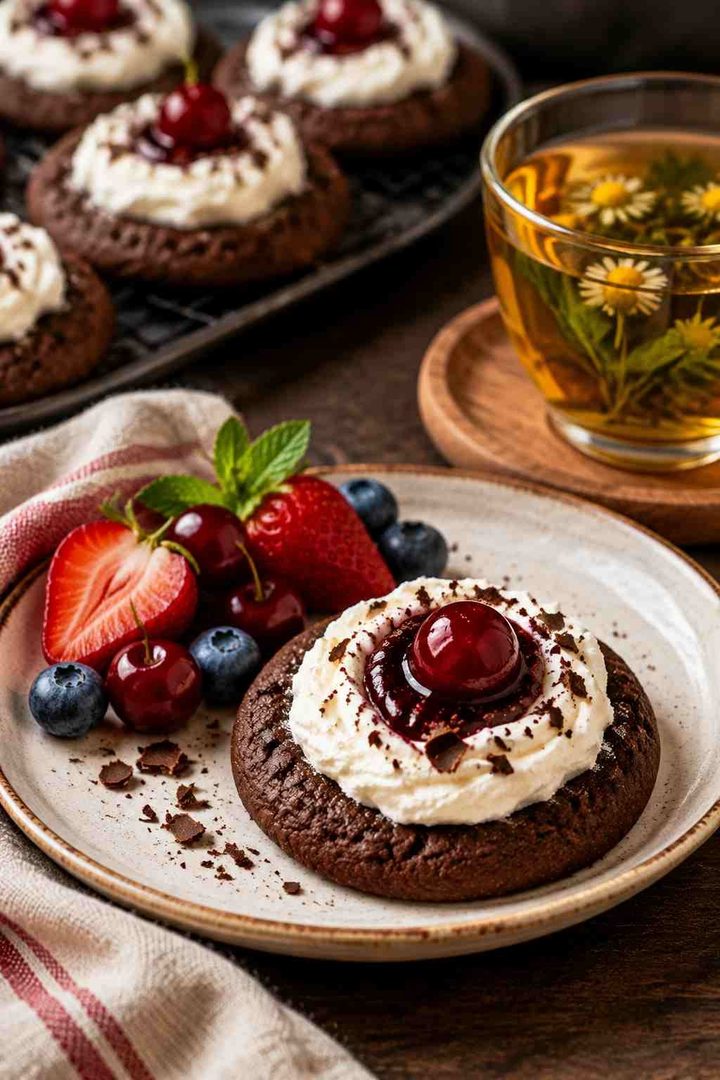
Pair one cookie with fresh berries and unsweetened herbal tea.
Make-Ahead Preparation
These cookies are ideal for planning ahead. Separate the baking from the decorating for the best results.
- Prepare in Advance: Bake cookies up to one week ahead and store airtight.
- A Few Hours Before Serving: Shave the chocolate and portion the cherry filling into a bowl.
- Just Before Serving: Add cherries, whipped cream, and chocolate shavings, then serve immediately.
Storage and Reheating
Storage depends on whether the cookies are decorated. Plain cookies last much longer than topped ones.
- Refrigerator Storage: Refrigerate decorated cookies; eat within one day before cream deflates.
- Freezer Storage: Freeze plain baked cookies airtight for up to three months.
- Reheating Instructions: Skip reheating; thaw frozen cookies at room temperature for one hour.
- Restoring the Original Texture: Add a bread slice to the container overnight to soften stale cookies.
Common Problems and How to Fix Them
Most thumbprint cookie issues come from butter temperature or baking time. Here is how to fix each one.
- The Texture Is Not Right: Dry cookies mean too much flour; spoon and level next time.
- The Flavor Is Too Mild: Use Dutch-process cocoa or add a pinch more salt.
- The Recipe Is Overcooked: Hide dryness with extra cream; pull cookies at 10 minutes next time.
- The Consistency Is Too Thick or Too Thin: Add 1 teaspoon milk to crumbly dough; chill sticky dough 15 minutes.
- The Final Result Looks Different Than Expected: Flat wells mean you skipped re-pressing; spread means butter was too soft.
Frequently Asked Questions
Can I make Black Forest Thumbprint Cookies ahead of time?
Yes. Bake the cookies up to one week early and store them airtight at room temperature. Add the toppings only on the day you serve them.
Can I use homemade whipped cream instead of spray cream?
Yes, but stabilize it first. Beat 1 teaspoon cornstarch or 2 tablespoons instant pudding mix into 1 cup heavy cream. This helps the cream hold its shape longer.
Why did the thumbprints puff up during baking?
The baking powder and baking soda make the dough rise in the oven. Press the centers again while the cookies are still warm to restore the wells.
Do decorated cookies need refrigeration?
Yes. The whipped cream and cherry filling are perishable once added. Refrigerate leftovers and eat them within one day for the best texture.
Can I freeze the cookie dough?
Yes. Freeze shaped, unpressed dough balls on a tray, then move them to a freezer bag. Bake from frozen at 350°F, adding 1–2 minutes to the bake time.